


 中文简体
中文简体





Previous Post
A kitchen renovation contractor calls us with the exact same question that lands in our inbox every other week: can you spray paint melamine board? He has a set of mid-1990s cabinet doors made from particleboard with a white melamine face. The client wants a matte charcoal finish so the cabinets match the new living room. Tearing out the entire cabinet system is not in the budget. The contractor owns an HVLP spray gun and has sprayed plenty of lacquer on wood, so he assumes the job will take an afternoon. The honest answer is yes, you can spray paint melamine board. But you cannot treat it like bare wood, and the reason lives at a microscopic level on the surface.
Melamine board has a resin-cured, sealed face. Bare wood drinks paint and gives the film a mechanical grip. Melamine repels paint. This single difference explains why so many DIY attempts to spray melamine peel like a sticker within months. Clean it properly, scuff-sand it lightly, apply a bonding primer, and choose a topcoat with the right chemistry, and the paint will stay put for years. This guide covers every step in that process, including a detailed supply list, a step-by-step spray sequence, a paint selection table, common mistakes that ruin the finish, and the situations where painting is the wrong move and replacing the board with a premium decorative panel gives a better long-term result.
Why Melamine Board Is Not Wood
Melamine board is a composite panel. The substrate is usually medium-density fiberboard (MDF), particleboard, or plywood. The decorative surface is a paper sheet impregnated with melamine resin, pressed onto the core under heat and pressure. That resin cures into a hard, glossy, essentially sealed layer. This layer gives the board its resistance to moisture, stains, and scratches. It also makes paint adhesion a genuine engineering challenge.
Paint needs a surface it can key into. On raw wood, the paint partially soaks into open pores and locks mechanically. Melamine is different. The resin closes the surface completely. There are no open pores. The paint stays on top like a plastic film. If the surface is smooth and sealed, the film has almost nothing to bite. This is why spraying melamine without preparation produces a finish that looks good for a week and then flakes off when a cabinet door slams or a cloth wipes across it.
The Sealed Resin Surface
The melamine face is not a decoration; it is a cured thermoset plastic. When you sand it lightly, you are not opening up a porous substrate. You are scuffing the plastic. Fine scratches give the primer a mechanical anchor. But the surface changes are micro-scale. You are not trying to remove the melamine layer. You are trying to create roughness that a primer can fill and grip.
Comparing Melamine with Other Common Substrates
| Property | Melamine Board | Raw MDF | Raw Plywood |
|---|---|---|---|
| Surface type | Sealed, resin-cured | Open, fibrous | Open, visible grain |
| Porosity | Very low | Moderate | Moderate to high |
| Paint adhesion | Requires scuffing and bonding primer | Good with standard primer | Good with primer and grain filler |
| Typical prep | Clean, scuff, prime | Sand, prime | Sand, fill grain, prime |
This table is not saying that MDF or plywood are automatically easier to spray. MDF has its own porosity challenges and produces a lot of dust when sanded. Plywood has grain telegraphing issues. But the point matters: if you are coming from those materials, melamine behaves differently. You need a dedicated prep strategy.
The Direct Answer: Yes, You Can Spray Paint Melamine Board
The short answer is yes. Spray painting is actually the preferred method for melamine board because it leaves no brush marks and produces a factory-like uniform coat. When you hold an HVLP gun or a quality aerosol can, you can build up a smooth film more easily than with a brush or roller. The catch is that spraying amplifies the preparation mistakes. Brush marks hide a lot of sins. A spray finish exposes every surface defect, every missed grease spot, and every skipped primer step.
The three non-negotiable steps before you pull the trigger are clean, scuff, and prime. Here is why each one matters:
- Clean: Grease, cooking oil, detergent residue, and silicone polish sit on melamine and come off only with a dedicated degreaser. Even a thin invisible film causes fisheyes and delamination in the spray finish.
- Scuff: Light sanding with 220-grit paper breaks the glossy resin seal and creates micro-scratches. This is not about removing the melamine; it is about giving the primer a surface profile.
- Prime: A bonding primer dries to a film that the topcoat can both chemically and mechanically attach to. Standard wood primer will not do. You need a primer labeled for melamine, laminate, glossy surfaces, or non-porous surfaces.
If you follow these three steps, the paint will tolerate regular handling, kitchen humidity, and repeated wiping. If you skip any one, the whole project becomes a temporary cosmetic fix that you will redo within months. There is no shortcut. The preparation work is the actual job; the spraying is just the final step.
Tools and Materials Checklist
Before you open a can of primer, lay out everything you need. Missing a supply halfway through the job often means leaving a half-sprayed door in a dusty garage overnight, and that is an invitation for a ruined finish.
Cleaning supplies
- Sugar soap or tri-sodium phosphate (TSP) solution
- Isopropyl alcohol for the final wipe-down
- Lint-free microfibre cloths
- A bucket of warm water
Sanding supplies
- 220-grit sandpaper or sanding sponge
- 320-grit sandpaper for the primer stage
- Sanding block to keep pressure flat
- Tack cloth or a vacuum with brush attachment
Primer and paint
- Bonding primer designed for melamine, laminate, or glass-smooth surfaces
- Urethane-modified acrylic paint or waterborne alkyd
- Optional 100% acrylic semi-gloss if using a spray can for small projects
Spray equipment
- HVLP gravity-feed spray gun or spray cans in the correct color
- Compressor with a water trap and regulator
- Paint strainer to filter the topcoat before pouring
- Spray shelter or a well-ventilated outdoor area with a drip-free backdrop
Protection
- Nitrile gloves
- Safety glasses
- Respirator with organic vapor cartridges
- Painter's tape
- Drop cloths or plastic sheeting
Do not skip the respirator. Melamine primer and solvent-borne paints release volatile organic compounds (VOCs). A paper mask stops dust; it does not stop solvent vapor. If you are spraying inside a home, seal the room with plastic sheeting and vent the vapor to the outside. A cheap respirator costs less than a single cabinet door.
Step-by-Step: How to Spray Paint Melamine Board
The actual spraying takes about twenty minutes per door. The preparation takes a full afternoon. Below is the order that works, including the tiny details that make the difference between a professional result and a peel-prone patch job.
Step 1: Remove Hardware and Mask Off
Take the doors off the hinges and lay them on sawhorses. Remove handles, knobs, and any backing plates. Unscrew the hinges and label each door with painter's tape so you know where it goes back. Mask the edges of any areas you do not want to paint. Cover the floor with plastic sheeting. If you are spraying in place, tape around the cabinet frames and cover the countertop with a drop cloth.
Step 2: Clean and Degrease
Mix sugar soap or TSP with warm water. Wipe the entire surface with a lint-free cloth, paying special attention to areas near handles where fingers leave oils. Rinse with clean water. Then wipe down with isopropyl alcohol. The alcohol dries fast and removes the last traces of detergent, which can cause fisheyes in the sprayed paint. Do not skip the alcohol wipe. It is the step that separates a clean surface from a chemically clean surface.
Step 3: Scuff-Sand
Wrap 220-grit sandpaper around a sanding block. Go over the entire melamine surface with even, light pressure. You are not trying to remove the gloss completely; you are breaking it into a matte, cloudy finish. Work in the direction from one edge to the other, not in small circles. Circles create visible scratches under a spray finish. Wipe away the dust with a tack cloth or vacuum. Any dust left behind will show up as pinpricks in the paint.
Step 4: Apply Bonding Primer
Pour the bonding primer into the spray gun cup and adjust the needle and airflow according to your gun manual. Spray from six to eight inches away, moving parallel to the surface. Keep the passes consistent and overlapping by fifty percent. The first coat should look even but still show the surface underneath. Let it dry for the time given on the can. Usually that is between one and two hours. Do not rush. Primer that is not fully dry will bubble under the topcoat.
Step 5: Sand the Primer
Once the primer is dry, take 320-grit sandpaper and lightly sand the entire primed surface. The goal is to remove any dust nibs or rough patches. You are not sanding through the primer. Wipe away the dust with a tack cloth. This step creates a silky surface that the topcoat will flow over, giving you a smooth factory look.
Step 6: Spray the Topcoat
Test the spray gun on a piece of cardboard before you touch the doors. Set the gun so you get a fine mist without runs. Spray two or three thin coats, allowing each coat to flash off for ten to fifteen minutes before the next. A thin coat is better than a thick one. A thick coat creates runs, sags, and orange peel. Move the gun in a steady, continuous motion. Start the pass just beyond one edge of the door and finish just beyond the opposite edge. Do not stop in the middle of the surface, because paint will pool.
Step 7: Allow Proper Cure Time
After the final coat, let the doors sit for at least twenty-four hours before you handle them. Do not reinstall them the same day. The paint may feel dry to the touch earlier, but the film is still releasing solvent. If you clean or push them into their hinges too soon, you leave fingerprints that cure into the paint. Give the doors a full seven days before routine cleaning or heavy use. A paint film that has not fully cured will scratch, dent, and stain far more easily than a cured one.
Choosing the Right Primer and Paint
You cannot pick any primer off the shelf and expect it to bond to melamine. The primer chemistry is the foundation of the job. The topcoat chemistry determines how long the finish survives in your environment.
Primers for melamine
The best primer choices for melamine board are shellac-based bonding primers and urethane-based bonding primers. Shellac-based primers dry fast, form a hard film, and create excellent adhesion on glossy surfaces. They also seal stains and odors, which can help if the melamine has absorbed smoke or cooking grease over the years. Urethane-based primers are slightly more flexible and are a bit more tolerant of temperature swings, which makes them a strong option for kitchen areas.
Avoid general-purpose wood primers. They are designed for porous surfaces and will not form the tough film that melamine needs. A standard run-of-the-mill primer will look fine when wet, then crack and peel within a few months because it never created a real bond.
Topcoat options
For the topcoat, the most reliable family is urethane-modified acrylic. It is water-based, meaning lower odor and easier cleanup, but it cures to a hard, flexible film that resists moisture, heat, and abrasion. Waterborne alkyd is the second choice. It dries to a slightly softer but still durable finish and self-levels well, so brush marks and spray ridges are less visible. Both are suitable for spraying with an HVLP gun.
Spray cans of specialty cabinet paint can work for small projects, but make sure the label states that it is designed for smooth surfaces or laminate. Do not use a standard acrylic latex wall paint. It dries soft and will scratch easily on a cabinet door. Do not use an oil-based enamel unless you are prepared for strong solvent fumes and a long recoat time.
| Paint Type | Adhesion on Melamine | Durability | Best Use |
|---|---|---|---|
| Urethane-modified acrylic | Excellent | High | Kitchen cabinet doors, furniture tops |
| Waterborne alkyd | Very good | High | Doors, trim, high-traffic panels |
| Oil-based enamel | Good | Medium to high | Renovation projects with solvent-safe workspace |
| Standard latex acrylic | Low | Low | Not recommended for melamine |
Six Common Mistakes to Avoid
Every professional has seen the same failed melamine spray job dozens of times. The peel is usually not the fault of the spray gun. It is one of the following mistakes.
1. Skipping the primer
The most common failure is spraying paint directly onto the melamine surface. The paint adheres just well enough to pass the stare test for a day or two. Then the temperatures change, the panel expands and contracts, and the film releases. No primer means no chemical bond.
2. Sanding too aggressively
Using 60-grit or 80-grit paper on melamine cuts through the thin decorative layer and exposes the raw substrate underneath. The exposed area absorbs moisture differently, causing blushing and discoloration in the finished paint. If you sand heavily enough, you also create rough scratches that will telegraph through the paint.
3. Spraying a heavy coat
A thick coat looks smooth for five minutes, then runs down the door and leaves orange peel when it dries. Thin coats are the answer. Let each coat flash off, then apply the next. The finish builds up evenly without runs.
4. Cleaning with a dirty cloth
If you use the same rag that you used to wipe the fine dust off the floor, you are spreading grease back onto the melamine. Use clean lint-free cloths. Keep one rag for the soap solution, one for the clean rinse, and one for the alcohol wipe.
5. Ignoring humidity
Water-based paints are sensitive to humidity. When the humidity is above seventy percent, the water in the paint evaporates slowly, and the paint can look cloudy or bloom. Check the weather before you spray. Aim for a day with low humidity and moderate temperature, ideally above fifteen degrees Celsius and below twenty-five degrees, unless the manufacturer specifies otherwise.
6. Rushing the cure
Reinstalling the doors the same afternoon is the fastest way to ruin a spray finish. Paint feels dry to the touch long before the solvent is gone. Give the paint at least a full day before handling and a full week before scrubbing. Patience at this stage doubles the finish lifespan.
How Long Does a Spray-Painted Melamine Board Last?
If you prepare the surface correctly, use a bonding primer, and spray a urethane-modified acrylic topcoat, you can expect four to six years of reasonable wear on kitchen cabinet doors. In a low-traffic environment like a bedroom wardrobe or an office desk, the same process can last eight years or more. The lifespan drops dramatically if you use a latex paint, skip the primer, or run the doors in a high-moisture area with frequent harsh cleaning.
The factors that shorten the finish include food grease, steam, dishwashing detergents, and direct sunlight through a kitchen window. UV exposure slowly breaks down the paint resin, causing yellowing and a chalky surface. You can mitigate that by applying two to three thin coats of a UV-resistant topcoat and by using a matte or satin finish instead of a gloss. Gloss finishes show wear sooner because the surface is more reflective and highlights scuffs.
If you are deciding whether to paint or replace a worn melamine board, it helps to know how the base material holds up. Read about the typical lifespan of a melamine board to understand whether your existing board is a good candidate for refinishing or a better candidate for replacement.
When Replacing the Board Is a Better Decision Than Painting
Painting is the right choice when the melamine board is structurally sound, the surface is just scratched or dated, and you want a new color. There are, however, situations where painting only masks the problem and costs you time and materials without fixing the core issue.
Consider replacement instead of painting when the melamine face is blistering or delaminating. Once the decorative layer starts lifting from the core, the board is already failing. Paint cannot reattach it. Water-damaged boards, which show swelling at the edges or a soft feel in the middle, also need replacement. The substrate has soaked up moisture, and any paint on top of it will eventually lift. Serious edge chipping, where the particleboard is exposed, is another trigger to replace instead of paint.
When the board is in good condition but you want a completely different surface texture, replacement with a premium decorative panel gives you options that paint cannot match. A factory-pressed melamine surface has a hardness that field-applied paint never reaches. It does not need repainting, and it offers textures like wood grain, rock, or fabric that a flat coat of paint cannot reproduce.
For example, instead of painting a flat white melamine surface and trying to mimic a natural material, a manufacturer-built 3D wood grain panel gives you the depth of real wood texture in a board that resists moisture far better than a painted surface.
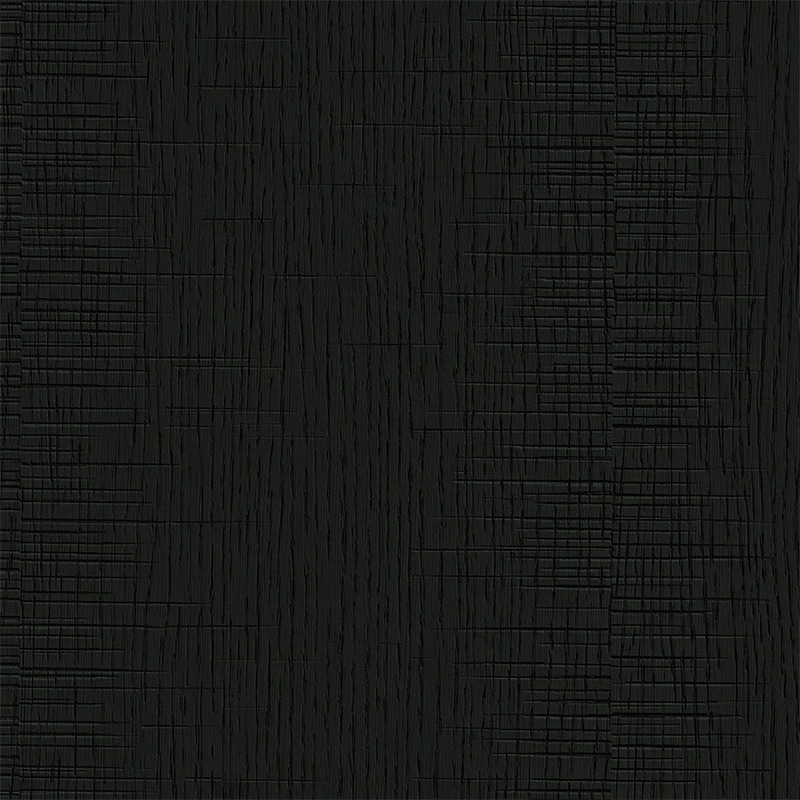 Yakco TS01 Synchronized Oak with Cutting Texture Melamine PanelThis melamine panel combines synchronized oak grain with a cutting texture, offering a tactile, authentic wood look that resists moisture better than painted surfaces. Ideal for kitchen or commercial renovations, it provides a durable, low-maintenance finish.View Product →
If you are renovating a kitchen or a commercial space and the budget allows for new panels, replacing the board with a decorative melamine panel is often the smarter investment. You skip the entire paint preparation cycle, and you get a finish that will resist scratches, heat, and cleaning chemicals for far longer than any spray coat.
How the Quality of the Melamine Board Affects the Result
Not all melamine boards are equal. A board with a dense, stable core and a well-bonded melamine face gives you a much better surface for painting than a cheap board with a thin decorative layer. When you sand a thin-faced board aggressively, you can wear through the color coating and expose the raw chipboard beneath. The exposed area absorbs moisture and paint differently, causing a blotchy finish that is very difficult to hide.
High-quality boards from professional manufacturers use controlled hot-pressing conditions and consistent substrate density. This means the surface is uniform from edge to edge, with no soft spots or uneven gloss. The substrate matters even if you intend to paint, because the board must stay flat and stable. If the core is inferior or has a high moisture content, the board can warp or swell after you have painted it, cracking the paint film.
Premium melamine panel producers like YAKCO New Materials focus on substrate performance as much as surface aesthetics. Their boards include options with high-moisture-resistant MDF, LSB, plywood, and fireproof board, giving the buyer a way to match the board to the use environment. The melamine face is bonded under controlled pressure and temperature, which results in a dependable surface for any application.
To understand how the substrate influences the final result, read the ultimate guide to melamine board composition and substrate selection. The choice you make there affects how well a spray finish holds up and how long the board itself performs in your space.
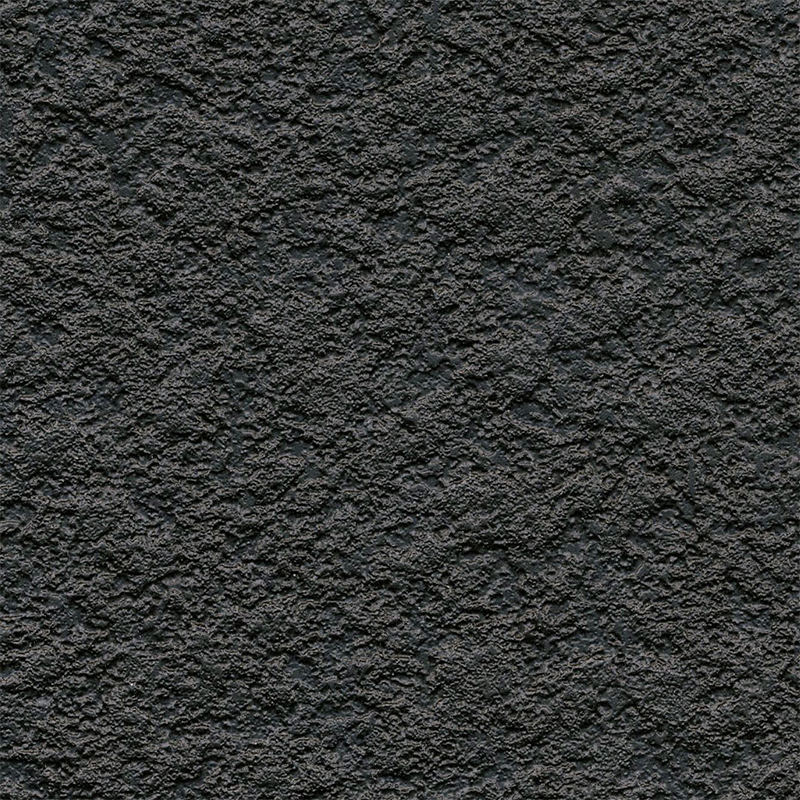 Yakco SS04 Rock Texture Panel with 3D Deep Embossed SurfaceFeaturing deep embossed 3D texture, this panel mimics natural rock layers, adding visual depth and tactile interest. Its factory finish outperforms spray paint in high-traffic commercial settings, offering a durable, heat- and moisture-resistant surface.View Product →
Professional and Commercial Considerations
In commercial projects, the decision to spray melamine board should not be made lightly. Hotel lobbies, restaurants, and office reception areas see daily traffic. Cabinet doors in these environments are touched, cleaned, and exposed to food acids. A field-applied paint system must compete with the factory finish that the board had before it was painted. The factory melamine surface is a cured thermoset plastic. A spray paint film is a thermoplastic. Thermoplastics are softer and more sensitive to heat and moisture.
Designers and contractors have been moving toward textured decorative panels for commercial spaces because they offer a tactile quality that a flat spray coat cannot replicate. A 3D deep-embossed panel creates real depth and shadow that responds to changing light across the room. This is especially valuable in feature walls and cabinetry surfaces where the visible texture becomes a design statement.
For a warm, tactile result that does not require painting, a melamine panel with a 3D leather texture offers the visual softness of leather without the maintenance cost of real leather or the painted finish that eventually peels. The factory surface maintains its performance year after year, which matters in spaces where downtime for refinishing is expensive.
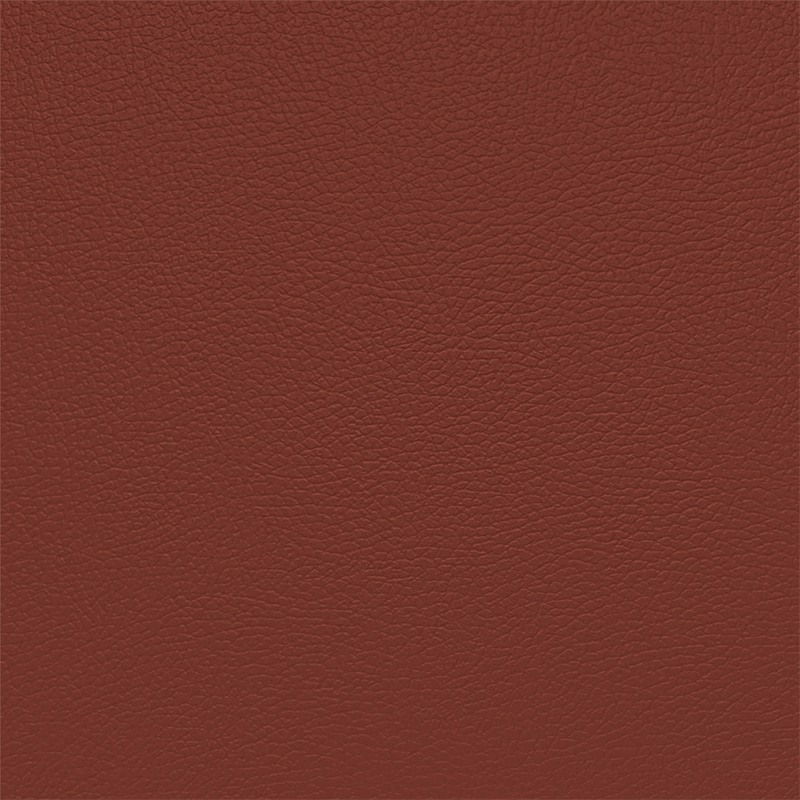 Yakco PZ02 Leather2 Texture Panel - Light Luxury MelamineWith a fine leather-like texture, this melamine panel delivers the warm, refined feel of leather without the maintenance. Its factory finish resists scratches and moisture better than painted surfaces, making it a cost-effective choice for permanent installations.View Product →
If a stretch of doors already exists and repainting is the only budget-compatible route, hire an experienced spray finisher who knows how to build adhesion systems for non-porous surfaces. Charge them with the responsibility to clean, scuff, and prime. A professional spray job on melamine can last as long as a factory finish only when the surface preparation protocol is followed exactly.
Final Verdict
Yes, you can spray paint melamine board. The process works and can produce a smooth, professional-looking finish. Treat it as a surface preparation project rather than a simple spray-paint job. Clean the surface with a degreaser and alcohol. Scuff it lightly with 220-grit paper. Apply a bonding primer designed for melamine. Then spray a urethane-modified acrylic topcoat in two or three thin coats. Let it cure fully before you reinstall the doors.
If the melamine board is structurally sound and you want a new color, painting is a smart and affordable option. If the board is damaged, if you want a surface texture that paint cannot deliver, or if you are working on a commercial project with heavy wear, replacing the board with a high-quality decorative melamine panel is the better long-term investment. The factory-applied finish will outlast a sprayed coat, and it will remove the repainting cycle from your maintenance plan altogether.





