


 中文简体
中文简体





Previous Post
You are standing in front of a set of kitchen cabinet doors that have seen ten years of steam, grease, and scrubbing. The melamine surface is still smooth, but the colour has faded around the handles. You ask the practical question: can you paint melamine board? The short answer is yes, you can. The long answer is that the result will look acceptable for a season or two, and then it will begin to peel, chip, or scratch—unless you follow a very specific set of preparation and coating rules. This article gives you the honest version from a manufacturer’s perspective, including when painting makes sense, when it does not, and what you should consider before you reach for the brush.
Melamine board is a composite panel covered with a decorative paper that has been impregnated with melamine resin. The resin is cured in a hot press, producing a hard, glossy, or matte surface that resists moisture and scratches. That same cured resin is what makes painting difficult. The surface is effectively a plastic-like shell with very low porosity and a relatively low surface energy. Waterborne paints, especially ones intended for wood, will sit on top rather than penetrating. Even solvent-based paints need help to bond.
Before we go further, let’s state the conclusion clearly so you know where this article is heading. Painting melamine board is technically possible, but it will never match the durability of a factory-finished melamine panel. If you need a temporary refresh or you are working with a low budget, careful preparation and the right coating system will give you a decent result. If you want a finish that survives daily cleaning, hot pans, and direct sunlight for more than five years, replacing the panel with a new melamine-faced board is the better engineering choice. We will expand both paths below.
What Melamine Board Actually Is
Melamine board is not a single material. It is a family of composite panels that share one common feature: a decorative surface layer made from paper saturated with melamine resin. The core can be particleboard, medium-density fibreboard (MDF), high-moisture-resistant MDF, OSB, or even plywood. The resin-impregnated paper is pressed onto the core under high temperature and pressure, which melts and cross-links the resin into a solid, continuous film. This film is what gives melamine board its colour, pattern, and resistance to everyday wear.
You may also hear this material called melamine-faced chipboard, decorative laminated board, or melamine particle board and MFC board. The general term in the wood-panel industry is “decorative surfacing.” The key point for your painting question is this: the surface is not wood. It is a thermoset polymer, chemically similar to the surface of a melamine dinner plate. Painted surfaces need some degree of absorbency, roughness, or chemical affinity to grip. Melamine gives you very little of those qualities.
How the Resin Cures
In a typical production line, a short-cycle press applies both heat and pressure. The melamine resin melts, flows into the micro-voids of the paper, and then hardens into a dense layer. The degree of resin cross-linking determines surface hardness, chemical resistance, and gloss level. High-quality panels—including those made by YAKCO—use resins that reach a high cross-linking density. That is excellent for durability, but it creates an inert surface that paint does not like.
The same logic explains why manufacturers recommend using the panel as-is rather than painting it. Trying to convert a high-performance surface into a paintable substrate introduces a weak intermediate layer. You are essentially adding a coating system on top of a surface that was never designed to be a primer-receiving base.
Why Paint Doesn’t Automatically Bond to Melamine
When you paint any material, the coating needs to adhere either by mechanical anchoring or by chemical bonding. Mechanical anchoring happens when the paint flows into tiny pits, scratches, or pores and physically locks in as it dries. Chemical bonding involves the paint actually reacting with molecules on the substrate surface. For porous materials like bare wood or concrete, mechanical anchoring is easy. For metals, the surface is roughened or etched to allow mechanical keying, and sometimes a phosphate conversion coating is used to create chemical bonding sites.
Melamine board has neither strong pits nor reactive functional groups. Its surface is smooth at the microscopic level, and the cured resin is chemically very stable. Water droplets will bead up on it because the surface energy is low compared to water’s surface tension. Paint behaves the same way: it tries to pull away from the surface as it dries. Left untreated, a coat of acrylic latex will sit on top, dry to a film, and then curl off in flakes when the substrate expands or contracts due to humidity changes.
The Role of Surface Energy
Think of surface energy as a measure of how “hungry” a material is to attract other substances. Water has high surface tension, so it prefers to stay as droplets on low-energy surfaces like melamine. High-energy surfaces, such as clean metal or glass, allow water to spread. The way to make a low-energy surface paintable is to either raise its surface energy by adding an intermediate layer or to physically roughen it so the coating can key into the surface.
That is why every credible painting guide insists on deglossing and using a specialized bonding primer. Without those steps, you are relying on luck rather than science. In our experience with UV-cured decorative surfaces, even a solvent-based primer can fail if the melamine surface has not been de-oiled first. Kitchen cabinets accumulate invisible grease films that are nearly impossible to see but absolutely destroy adhesion.
Is Painting Melamine Board Ever a Good Idea?
Let’s separate myth from practical reality. There are three honest scenarios where painting melamine makes sense. The first is a short-term cosmetic fix. Maybe you are selling a house and need to refresh dated cabinet colours without a full renovation. The second is a small area where replacement is impractical. For example, a built-in shelf that is glued and screwed into a corner may be very difficult to remove without damaging the surrounding structure. The third is a purely aesthetic experiment where you do not care about the finish lasting beyond a year or two.
There are also scenarios where painting is a poor business decision. If you are a professional contractor or a homeowner with a long-term residence, repainting melamine surfaces usually costs more per year of service than replacing the panels. Add the cost of proprietary primers, multiple coats, and the necessary downtime, and the financial advantage disappears quickly.
What the DIY Community Says
Online forums contain a spectrum of experiences. Some people paint melamine cabinets and report that the result lasts for years. Others sand the surface too aggressively and see scratches show through the paint. A common mistake is to skip the primer because the can of topcoat claims to be “bonding.” In truth, melamine is so inert that almost every topcoat benefits from a dedicated tie-coat primer. The primer should be specifically labelled for non-porous surfaces, not just a generic all-purpose primer.
Step-by-Step Preparation Before Painting
If you decide to proceed, preparation is 70 percent of the outcome. The remaining 30 percent is primer and topcoat quality. Here is the sequence we would recommend for a kitchen cabinet or any interior melamine board.
- Remove all door handles, hinges, and hardware. Lay the panels on a flat, dust-free surface.
- Clean the surface with a strong degreaser. TSP (trisodium phosphate) or a dedicated wood-panel cleaner works well. Rinse thoroughly and allow to dry completely.
- Wipe down with a tack cloth to remove dust. Any residual grease will prevent adhesion.
- Lightly abrade the surface with very fine sandpaper—around 220 to 320 grit. Do not use aggressive sanding. The goal is to create a micro-texture, not to remove the melamine layer. At that grit, you will not visibly scratch the surface, but you will provide enough tooth for the primer to grip.
- Clean the sanding dust again with a tack cloth, then wipe with a small amount of isopropyl alcohol to remove any remaining oils.
- Repair any dents or chips with a filler designed for laminates. Use a flexible wood filler and avoid fillers that shrink or crack on smooth plastic surfaces.
The roughness of the sanded surface must remain subtle. If you press a finger against the board, it should feel smoother than an eggshell but slightly rougher than a mirror. Over-sanding will expose the cellulose fibres beneath the resin, causing the paint to look streaky and uneven. You are not trying to strip the melamine; you are trying to “wake up” the surface’s bonding potential.
The No-Sanding School
Some decorators argue that you should never sand melamine because the surface scratches easily and the scratches will telegraph through the paint. That warning applies to heavy sanding with 80-grit paper. Light sanding with 320-grit does not visibly degrade the finish. Even so, there is an alternative: use a liquid deglosser or a chemical etching primer designed for glossy surfaces. These liquid products create a chemical roughness without any mechanical abrasion. If you choose that route, apply the deglosser generously, rub it in the direction of any existing grain, and wipe off the residue with a clean cloth before it dries.
Choosing the Right Primer
The primer is the bridge between the melamine surface and your topcoat. A standard wall primer is not enough; it will peel just as easily as a topcoat. You need a primer specifically formulated for hard, non-porous surfaces. There are four main categories to consider.
| Primer Type | Bonding Mechanism | Best Use | Application Difficulty |
|---|---|---|---|
| Bonding primer (urethane or acrylic-based) | Contains adhesion-promoting resins that cling to smooth surfaces | Most residential cabinet repaints | Easy to apply by brush or roller |
| Shellac-based primer | Seals stains and creates a film that accepts topcoat | Very smooth surfaces with old stains or tannin bleed | Only for solvent-based topcoats; strong odour |
| Epoxy primer | Chemically cross-links, forming a tough barrier | High-durability situations, including moisture-prone areas | Two-part mixing; short pot life |
| Etching primer | Contains solvents that micro-etch the melamine surface | Ideal for glossy thermofoil and melamine | Best applied with spray or a high-quality roller |
The primer you select affects both the final adhesion and the required topcoat. A bonding primer usually accepts both waterborne and solventborne topcoats, which gives you flexibility. An epoxy primer creates a nearly indestructible base but is harder to sand and may require a separate topcoat that can withstand yellowing. For most DIY projects, a high-quality bonding primer is the safest starting point.
Topcoat Options and What to Expect
Once your primer is dry, the topcoat determines the look and toughness of the final surface. Because melamine board is already a durable material, the topcoat only has to protect the primer and provide the desired colour. That said, not every paint performs equally.
Waterborne Acrylic or Polyurethane
Waterborne polyurethane acrylic paints are the default choice for kitchen cabinets. They cure into a hard, flexible film with good yellowing resistance. They clean up with water, have low odour, and are widely available in cabinet finishes. The downside is that they need longer to cure before the cabinet can tolerate heavy handling—typically seven days to full hardness. They are also more prone to water marks than solvent-based paints if the surface is not fully cured.
Solvent-Based Alkyd Urethane
Alkyd urethane paints flow better and dry to a thicker film. They are excellent for scratch resistance, and they level out brush marks. However, they have a strong solvent smell and clean-up requires mineral spirits. They also tend to yellow more in the presence of UV light, which is a real concern for bright white paints near a window.
Epoxy or Two-Part Catalyzed Coatings
If you want the maximum durability, two-part epoxy or polyurethane coatings are used in commercial kitchens and industrial equipment. They achieve chemical cross-linking that is very close to the melamine resin itself. The drawback is cost, complexity, and a short working time. For a single set of cabinet doors, this route is usually overkill. For a small piece of furniture that gets heavy use, it may be worth it.
In all cases, thin coats are always better than thick ones. Thick paint on a non-porous surface dries from the outside in, creating solvent bubbles and uneven tension. You want three thin coats, sanding lightly with 400-grit between coats, rather than one heavy coat.
The Practical Application Process
Painting melamine is a controlled exercise in eliminating mistakes. The first environmental control is temperature and humidity. Keep the room between 18°C and 24°C, with humidity below 65 percent. If it is too humid, the solvent in your paint will evaporate more slowly, causing the film to sag or trap water. If it is too cold, the paint will not flow and will leave brush marks.
Brush vs. Roller vs. Spray
A brush gives you control but leaves visible strokes. Use a good quality synthetic brush with tapered bristles to reduce brush marks, and brush along the edge first, then fill in quickly. A short-nap microfiber roller produces a smooth finish but can create a slight texture that some people like for a matte look. Spraying is the ideal method for melamine because it delivers a uniform film with no texture, but it requires expensive equipment, a well-ventilated area, and careful masking.
If you spray, use a high-efficiency airless sprayer with a fine tip, and keep the spray gun moving in parallel passes. Overlapping 30 to 50 percent on each pass will give you an even coat. Spraying is also faster, which means the paint is less likely to flash off before it levels.
Drying and Curing
Melamine is non-absorbent, so paint dries by solvent evaporation alone. This means you must wait the full recommended time between coats. Rushing the second coat can cause the solvent in the second coat to attack the first, leading to wrinkling. After the final coat, let the surface stand for at least 48 hours before reattaching hinges and handles. Even if the paint feels dry to the touch, it will be vulnerable to dents and indentations for several days.
Common Failure Modes and How to Prevent Them
When you paint melamine board, you are creating a composite coating system. Each layer has a different coefficient of thermal expansion. When the kitchen heats up during cooking, the panel expands slightly, and the paint film is being pulled. If the adhesion is weak, the film lifts and forms bubbles.
Peeling Around Edges
The most common failure is peeling on the sharp edges and corners of the panel. The melamine surface is cured to a dense shell, but the edge is physically cut. Moisture can get into the edge, swells the core, and pushes the paint outward. To mitigate this, slightly round the sharp corners with fine sandpaper before painting. Also, fill any visible edge joints with a waterproof filler and seal the edges with primer.
Scratches and Abrasion
A painted surface will always be softer than a factory melamine surface. Handle the cabinet doors with care after repainting. Use soft cloths, not abrasive sponges. If you are painting a desktop or a heavily used surface, apply a wax coat after the paint has fully cured to improve scratch resistance—this is a temporary measure and will need periodic renewal.
Yellowing
Solvent-based paints yellow over time, especially white or light colours. The yellowing is caused by UV radiation and oxidation. To minimize this, choose a topcoat with UV stabilizers or use an acrylic topcoat. Also, avoid installing repainted panels in direct sunlight, and consider a clear topcoat with UV absorption properties.
Painting vs. Replacing the Board: A Cost and Durability Comparison
You now know the steps to paint melamine board successfully. But should you? The honest answer depends on your timeline, budget, and dedication. A good painting job takes at least three days: one day for cleaning and sanding, one day for priming and first coat, and one day for the remaining coats and reinstallation. The material cost includes degreaser, tack cloths, fine sandpaper, bonding primer, two to three cans of high-quality topcoat, brushes, rollers, tape, and protective sheeting. If you do it yourself, you might spend $100–$200 in materials. If you hire a contractor, the labour will dominate the bill.
| Factor | Repainting Melamine | Replacing with a Premium Melamine Board |
|---|---|---|
| Initial material cost | Lower ($100–$200 per set) | Moderate ($200–$400 per set) |
| Labour time | 3–5 weekends for DIY | 1–2 days with a fabricator |
| Surface hardness | Soft to medium, prone to scratches | High, factory-cured melamine is near-bulletproof |
| Water resistance | Good only if fully sealed | Excellent; melamine resin is inherently waterproof |
| Expected service life | 1–4 years | 10–15 years or more |
| Repair ease | Touch-up paint can match small marks | Scratches are harder to repair but far less likely |
If you already have a damaged melamine board, the decision hinges on how much time you want to invest. Painting gives you a new look without removing the old panel structure. Replacing the panel gives you back the original factory finish and performance. For most homeowners, replacing in two or three key visible areas, such as the kitchen cabinet fronts, is more cost-effective in the long run than a full repaint that might fail in three years.
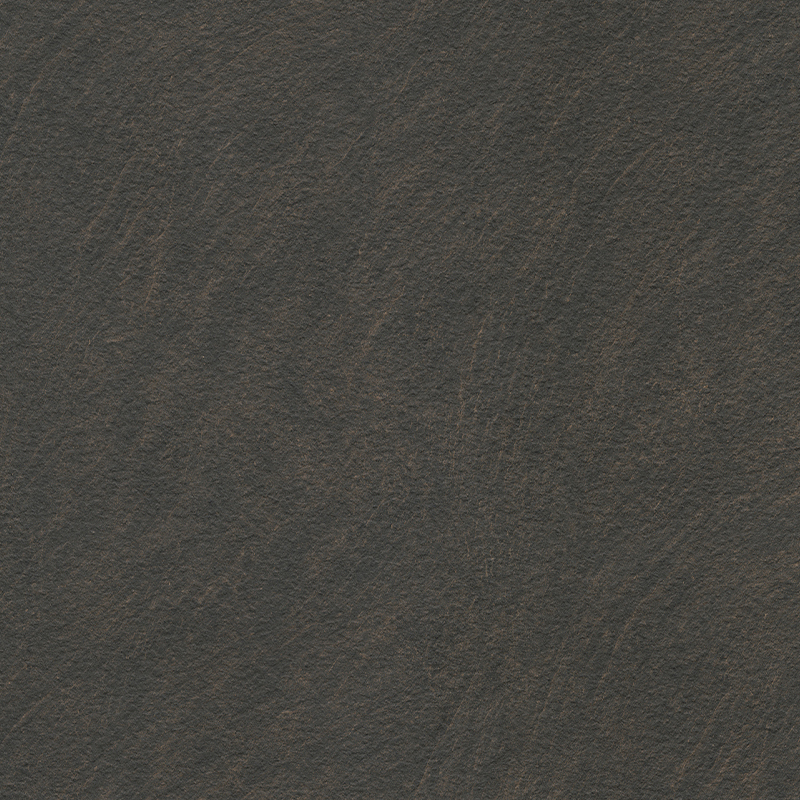 High-Moisture-Resistant MDF Board for Durable Interior PanelsThis melamine-faced MDF offers superior humidity resistance, preventing edge swelling and ensuring a long-lasting finish. Ideal for kitchens and bathrooms where painted surfaces often fail, it provides a practical alternative to repainting.View Product →
For manufacturers, specifiers, and builders, the practical answer often points away from paint and toward selecting the right panel the first time. Options include different core substrates for wet areas, fire-rated boards for public spaces, and 3D-pressed decorative panels that do not need any painting. YAKCO manufactures a range of melamine-faced boards with different base materials. The selection of the right substrate before installation eliminates the need to coat the surface later. For example, high-moisture-resistant MDF can withstand humidity much better than ordinary particleboard, reducing the risk of edge swelling that would kill a painted finish.
What a Panel Manufacturer Knows About Surface Durability
We produce decorative panels under the YAKCO brand, and we have tested the limits of melamine surfaces extensively. The melamine film that we press onto our boards is designed to be the final finish. It is not a paint-ready surface, and it does not need to be. The resin is cured at a temperature close to 200°C during the short-cycle press step. This curing process gives the surface a unique combination of hardness, chemical resistance, and heat tolerance that nearly no paint system can replicate.
When customers ask us if they can paint our panels, our answer is usually: you can, but you will be sacrificing the factory finish that you already paid for. A painted surface will have a maximum pencil hardness of maybe 2H to 4H, depending on the paint chemistry. A well-cured melamine facing often registers much higher on the same hardness test. In kitchen environments, the paint layer will also be more susceptible to food acid staining. This creates a hard-to-clean area around the cooktop and sink.
The same applies to the 3D textured surfaces we specialize in. Deep embossed wood grains, stone patterns, and fabric textures are done by pressing a textured paper against the panel, which produces a tactile finish that is part of the board itself. If you paint over such a textured panel, you fill the valleys with paint, losing the depth and shadowing that makes the texture attractive. You also run the risk of the paint pooling in the recesses and creating visible unevenness. That is why we always advise clients to choose a panel that already matches their design rather than painting a panel to try to change it.
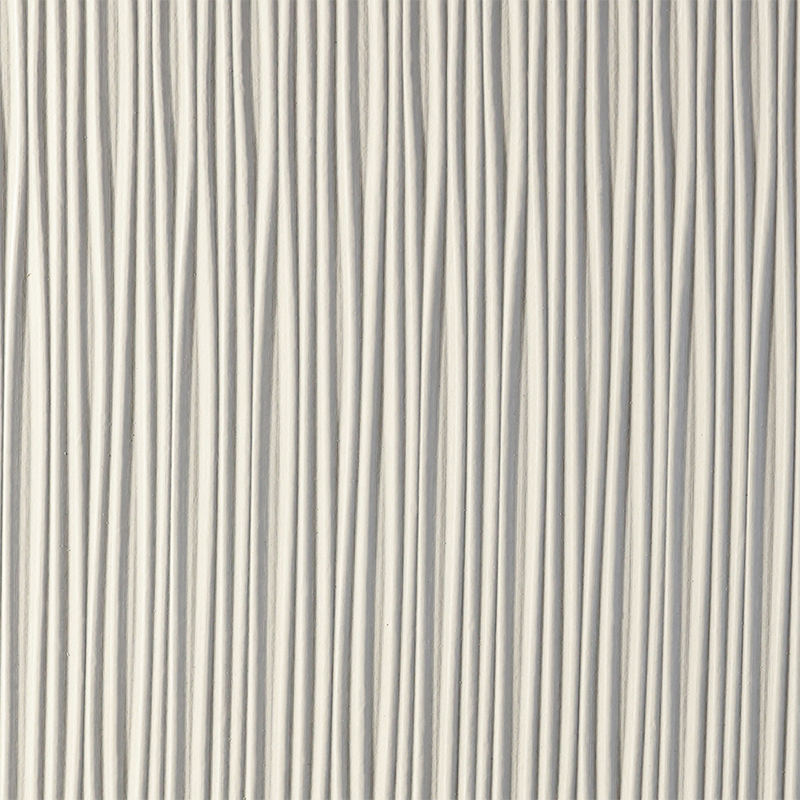 3D Wave Textured Panel Mimicking Carved Wood AestheticsThis deep-embossed panel replicates the tactile depth of hand-carved wood without the cost or maintenance. Its textured surface adds light and shadow effects that paint cannot achieve, making it a smart upgrade over repainting.View Product →
Our manufacturing technology includes synchronized hot-pressing, where the wood-grain texture exactly matches the pattern in the deco paper. This is important for anyone thinking about painting: the synchronization creates a realistic wood or stone feel that is impossible to achieve with paint. The texture itself becomes the visual feature, and there is no need to add a topcoat. A painted melamine board is a flat surface with a colour; a synchronized textured board is a surface that plays with light and shadow in a way that paint cannot emulate. When you consider the cost, time, and performance trade-offs, choosing a factory-finished panel is usually the stronger decision.
Environmental and Health Considerations
Painting melamine board involves solvents, primers, and cleaning agents. Even the most environmentally friendly paints contain some volatile organic compounds. Ventilation is essential. The off-gassing of solvents is a short-term issue, but the waste from unused paint, solvent-soaked rags, and left-over primer adds to your household disposal load. In contrast, a factory-produced melamine board with low-emission adhesive, such as an MDI-based resin system, contributes to indoor air quality from day one. YAKCO states that it uses MDI medical-grade adhesive in its substrates, which the company reports meets ENF-level formaldehyde emission requirements. That is a meaningful difference when you compare full lifecycle emissions of repainting versus replacing.
Of course, repainting can also be seen as a sustainable choice because it extends the use of existing panels, avoiding the energy and materials along the replacement pathway. There is no universally correct answer. The greenest option depends on whether your panel is structurally sound and whether your paint choice is low-VOC. If you decide to repaint, buy products in the smallest practical sizes, use reusable roller covers, and dispose of solvents according to local regulations.
When You Should Absolutely Not Paint Melamine Board
Some surfaces are simply not worth the trouble. If the melamine surface has deep scratches where the core is exposed, painting will not hide the damage and may even accentuate it. If the board is in a high-splash area such as a sink surround or a bathroom vanity, water ingress will likely create repeated delamination. If the melamine has a glossy decorative finish with a mirrored or metallic effect, painting will almost certainly look flat and disappointing.
Another no-go is melamine board that has been exposed to high heat, such as a backsplash behind a stove where the resin may have degraded. The surface may be too burnt to accept a primer. In these cases, replacing the panel is the right path. If the surface is only mildly damaged, you can sometimes use a decorative thermoplastic laminate as a top layer instead of paint, but that is a different project.
When Replacement Wins
Once you decide replacement is better than painting, you can also upgrade the design. You can choose a 3D decorative wall panel with a wood-grain or stone-grain embossing, which produces a premium appearance in a single installation. These panels are engineered to be installed directly on the wall or as cabinet fronts. They give you the look of custom textured surfaces without the risk of paint cracking or peeling.
 Stone-Inspired 3D Wall Panel for Light Luxury InteriorsDesigned to replace natural stone, this panel offers realistic rock textures and durability with easy installation. It withstands moisture and staining, providing a long-lasting decorative surface for commercial spaces like hotel lobbies.View Product →
For wall panels in particular, the mechanical performance of the melamine facing is only half the story. The real advantage is that the panel installs once and then serves as the final decorative surface for years. The resin surface resists yellowing, staining, and moisture far better than a painted surface, and it requires very little maintenance. Products in our range, such as the rock pattern wall panels, replicate the irregular texture of natural stone while preserving the practical benefits of a raw material that is uniform, lightweight, and easy to cut. In a commercial setting such as a hotel lobby or a reception area, that combination of realism and durability is why panel replacement beats painting in nearly every head-to-head comparison.
Final Verdict: Can You Paint Melamine Board?
Yes, you can. It requires a great deal of preparation, a bonding primer, a durable topcoat, and a realistic expectation of the final durability. It is a valid low-cost renovation strategy when you want to change the colour of a melamine cabinet without dismantling it. It will not, however, restore the performance of the original factory finish. The paint will be softer, more porous, and more sensitive to humidity and cleaning chemicals. It will likely need to be redone within a few years.
From a manufacturer’s point of view, we see painting as a temporary fix that works well when the alternative is replacing the entire cabinet frame. But if you are constructing a new fit-out, designing a kitchen, or specifying panels for a commercial project, choose a melamine-faced board with the right core and finish for the intended use. You will get a surface that does not require an extra coating system, lasts longer, and performs better under daily use. The phrase “can you paint melamine board?” is a practical question with a scientific answer. The better question is: should you? Our answer is only if you have to.





