


 中文简体
中文简体





Previous Post
Drill a 5 mm shelf-pin hole into the edge of an 18 mm melamine-faced panel with an ordinary twist bit running at about 2,000 rpm, and you will lose a ring of white surface paper roughly 8 mm across. Same hole, same panel, same drill: switch to a brad-point bit, put a scrap of MDF underneath, and feed the bit at a moderate speed, and the hole comes out clean enough that you never reach for the touch-up pen.
Clean melamine boring comes down to four things, and they rank in roughly this order: cutter geometry, support on the exit side, protection of the decorative surface, and the match between spindle speed and feed pressure. Everything else — bit brand, 18 V versus 12 V, keyless chuck versus hex shank — is secondary.
The material itself explains why. A melamine panel is a sandwich: a decorative paper saturated with melamine resin, pressed onto a particleboard or MDF core at roughly 150–200 °C until the resin cross-links into a thermoset skin about 0.1–0.3 mm thick. That skin is hard, and it is brittle. It has almost no elongation, so it does not stretch under a cutting edge; it fractures. Three loads act on it during drilling: the downward pressure of the drill point before the cutting edge engages, the scraping action of the chisel edge of a standard 118° twist bit, and the punch-through force at the exit when the last few millimetres of core are pushed out instead of cut. Control those three and the hole is clean.
Choosing a Bit by Hole Size and Location
For hand-held drilling, a twist bit is the worst available choice. Its 118° point angle and non-cutting chisel edge are designed to push metal aside and clear chips, not to slice a brittle plastic skin. Every other option below beats it, and the difference between a mediocre hole and an invisible one is usually a change of bit, not a change of technique.
| Hole | Bit | Why it works | Common mistake |
|---|---|---|---|
| 3–6 mm shelf-pin holes, hand-held | Brad-point bit with centre spur and outer spurs | The outer spurs sever the melamine skin before the centre spur reaches the core | Using a twist bit; runout tears the skin on one side |
| 6–15 mm cable and ventilation holes | Down-cut spiral router bit in a trimmer with a template or guide bushing | The flutes shear the skin downward into the hole rather than lifting it outward | Trying to use a router bit in a hand drill |
| 26–35 mm hinge cups | Forstner bit or dedicated hinge-boring bit, drill press only | The rim cuts a full circle before the body of the bit touches the surface | Tilting in with a hand drill; the rim cuts an oval and tears |
| Any diameter where surface quality is critical | Router with carbide down-cut spiral and template | Cutting proceeds from the face downward, so there is no point pressure at all | Feeding too slowly and scorching the resin with friction heat |
One exception is worth knowing. If the only tool available is a hand drill, you can still get an acceptable hole by drilling a small pilot first, then opening it up with a brad-point bit held in a guide block. The guide block does the work the second hand cannot: it holds the bit perpendicular so the spurs engage evenly all the way round.
Speed, Feed and the Tape Trick
Spindle speed matters, but less than most people assume. On a hand drill, stay in the middle of the range — somewhere around half to two-thirds of maximum, which usually works out to about 1,200–1,800 rpm for small bits. Too fast and friction softens the melamine resin; the bit starts to smear instead of cut, the hole drifts oval, and the skin feathers. Too slow and you have to push hard to keep the cut going, and push is exactly the load that fractures the skin in the first place.
Feed pressure should be firm and steady, not aggressive. Listen for a cutting sound rather than a rubbing sound. If the pitch rises and the drill starts to squeal, you are polishing the hole, not cutting it — back out, clear the chips, and go again.
Tape is a cheap, honest improvement. Lay a strip of masking tape across the bore location in a cross and press it down firmly. The tape supports the fibres immediately around the cutting edge, and in practice it removes roughly half of the small edge nibbles you would otherwise see. It does not replace a proper bit, and it will not save a hole drilled at 3,000 rpm with a blunt twist bit, but it costs nothing.
Chip clearing is the step everyone skips. Every 4–5 mm of depth, withdraw the bit completely and let the flutes empty. Compacted chips inside the hole create outward pressure on the bore wall, and that pressure is the single largest cause of blowout on the exit side. On deep holes in thin panels, clear chips twice as often as feels necessary.
Backing, Clamping and Workholding
Entry-side damage is visible and annoying; exit-side damage is worse, because it happens on the face you meant to show. A backer board solves it, and there is no substitute for one. Clamp a piece of 18 mm MDF or scrap particleboard behind the workpiece so the bit continues into the backer for 2–3 mm after breaking through. The core is then supported right up to the last fibre, and the skin is cut rather than punched.
Clamping matters for a second reason. A brad-point bit grabs as the spurs bite, and an unclamped panel will lift and shift. Use two quick clamps and a sacrificial strip underneath, or clamp the panel to the bench with a batten. If you are boring into a cabinet that is already assembled, bear the reaction with a caul or a right-angle block rather than your free hand.
A drill press is not mandatory, but it converts a good result into a repeatable one. It supplies a vertical stroke, a depth stop, and a constant feed rate — three of the four variables that decide hole quality. For anything above 10 mm, particularly hinge cups, a drill press with a sharp Forstner bit is the difference between a production line and a repair job.
Pilot Holes, Screws and Edge Boring
Cabinet carcasses in melamine-faced board are usually joined with 4 mm screws into 3.5–4.5 mm pilot holes. The pilot hole does two jobs: it stops the screw from wedging the core apart, and it stops the thread from lifting the melamine skin as the fastener pulls in. Drill the pilot through the panel you are fixing and stop just short of the panel you are fixing to, then countersink the head so it sits flush under the surface.
Edge boring deserves separate attention. The banding on an 18 mm edge is often thinner and more brittle than the face veneer, and a hole drilled within about 20 mm of the edge — a hinge cup, a connector housing, a cam dowel — will swell the edge if the bit is not perfectly sharp. Support the edge with a backer clamped flush to it, and reduce the feed rate by about a third compared with a face bore.
For repetitive work, a multi-spindle line borer is worth the investment. It bores every shelf-pin position in one plunge, at one feed rate, with one set of sharp bits, so every hole in the batch has the same edge quality. Single-hole boring by hand always produces variation, and variation is what shows up on a visible gable.
Substrate Matters: How the Core Changes the Cut
The decorative face may be identical across a product range, but boring behaviour belongs to the core. Two panels with the same surface paper can drill completely differently, and the reason is density, resin content, and the direction of the wood or chip structure underneath.
MDF is the most predictable core to bore. Its density is uniform, it has no grain direction, and it cuts the same in every direction, which is why hinge cups and shelf-pin holes come out clean with very little fuss. The trade-off is dust: the particles are extremely fine, they pack into the flutes quickly, and a bit that is not withdrawn often enough will heat up, glaze the melamine resin, and leave a ragged edge. Keep the depth of each plunge short and the bit will reward you.
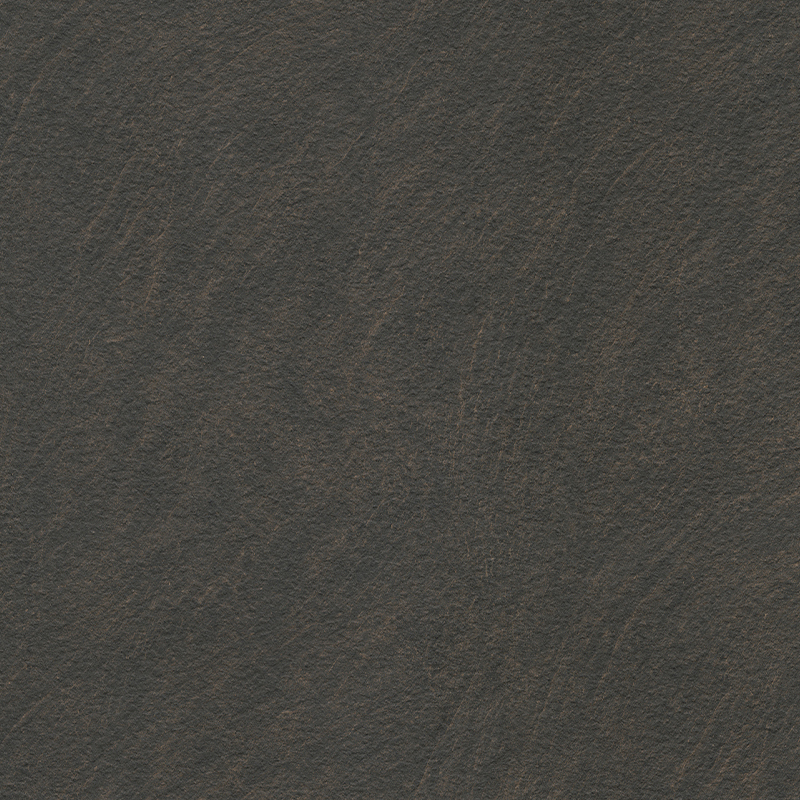 MDF - Yakco Silver Melamine Board SubstrateSilver MDF substrate panel from YAKCO's range, placed in a discussion of uniform cores, clean boring, and humidity-related panel choices.View Product →
HMR MDF behaves like standard MDF with one important difference: the moisture-resistant core carries a higher resin content, so it is marginally denser and slightly more abrasive. Feed a little slower and clear chips a little more often. In return, the denser core fractures less cleanly at the exit, so blowout on the back face is noticeably smaller than in standard board. For kitchen units, wet rooms, and any panel that will see humidity, that is the trade you want to make.
Plywood cores behave differently again. The veneer layers and the glue lines interrupt the cut, so the bit experiences a series of small shocks as it passes through each glue line, and any runout in the bit is amplified. The result is a hole that is straight but slightly rougher at the walls. Use a sharp bit, reduce the feed as each glue line approaches, and clamp both faces so the panel cannot resonate. In return, plywood holds screws far better than particleboard and is far more forgiving of a pilot hole that is one size too large.
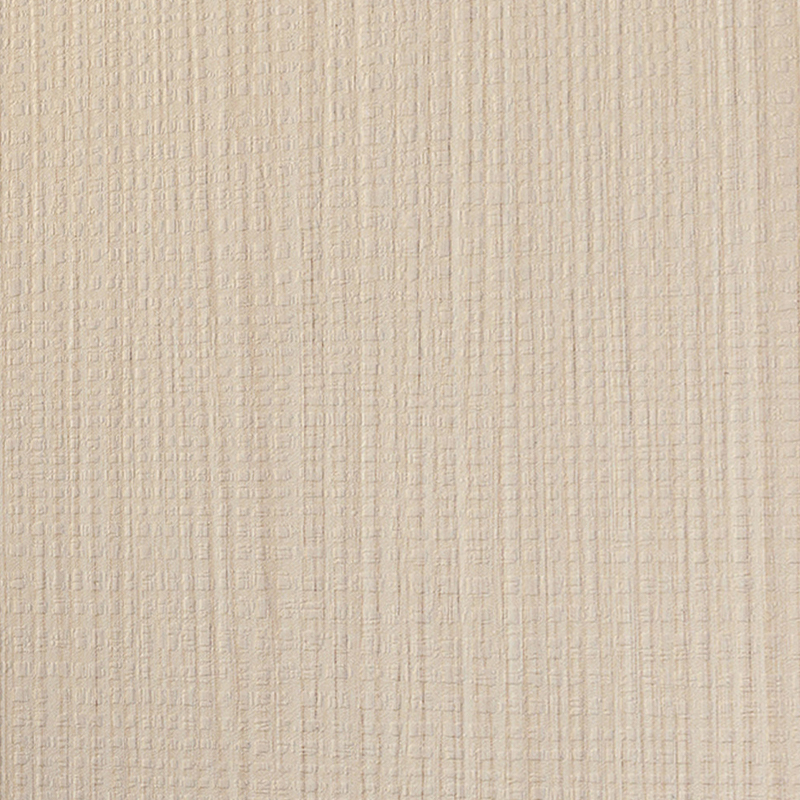 Plywood - Lekco Silver Substrate PanelSilver plywood substrate from Lekco, presented in a discussion of plywood core cutting behavior and textured decorative panels.View Product →
Deep-embossed and 3D-textured surfaces add one more variable. A raised texture means the bit touches the high points of the pattern first, so the effective contact area at the moment of entry is smaller and the local pressure is higher. On these boards, drop the feed rate at the start of the cut, let the spurs establish the perimeter, and only then increase pressure. The hot-pressing and surface-treatment technology behind these panels is what makes the texture durable enough to survive boring at all, but it does not change the physics of the first half millimetre.
If you want a wider view of how core selection interacts with edge quality, edge banding, and screw holding, there is a fuller discussion of melamine board substrate selection that covers the comparison in more depth.
Hinge Cups, Shelf Pins and Large-Diameter Holes
A 35 mm hinge cup in an 18 mm panel is typically 11.5–13 mm deep, which leaves 5–6 mm of material behind it. That is thin enough that a poorly supported cut will push a bulge out the far face, and you will see it after assembly. Set the depth stop so the bit stops 0.5 mm above final depth, then finish by hand. Run the drill press at 500–900 rpm, with a backer clamped under the door, and make a test bore in an offcut to confirm the depth before committing.
Shelf pins are the opposite problem: small, numerous, and usually bored with a hand drill into a visible panel. Use a 5 mm brad-point bit, mark the positions with an awl rather than a pencil, and bore through a shop-made drilling jig so the holes stay on centre. An awl mark is a small cone that the spur seats into; a pencil mark is a flat smudge that the bit will wander off.
For holes above about 20 mm in a hand-held situation, a hole saw is tempting and usually a mistake. The pilot bit centres nicely, but the toothed rim enters the melamine at an angle and tears a ring of skin around the hole that is difficult to conceal. If a hole saw is the only option, drill halfway from each face and finish with a sharp knife, and expect to spend as much time cleaning up the edge as you did cutting it.
Repairing Chip-Out When It Has Already Happened
Not every bore goes to plan, and a repair that is invisible at arm's length is often good enough. Work through these in order, from least to most invasive.
- Trim the raised fibres first with a sharp chisel held nearly flat, slicing outward from the hole rather than into it. Most edge damage looks worse than it is until the loose flakes are removed.
- Build the edge back with fine sawdust mixed with a little cyanoacrylate, press it in with a scraper, and sand flush after it cures. On white and light-grey melamine the match is close; on dark or textured surfaces it is less convincing.
- Touch up with a colour-matched repair pen. At a metre's distance, a filled and coloured chip on a white gable reads as nothing at all.
- Re-bore 0.3–0.5 mm oversize with a sharp bit at low speed to dress the damaged wall. This saves a surprising number of holes that were only marginally torn, but it will not fill a missing chunk of skin.
- Plug and relocate. Drill out the damaged hole, glue in a hardwood dowel, cut it flush, and move the boring position 15–20 mm along the panel. On a hidden interior face this is nearly always the fastest fix.
Many of these techniques are old shop practice rather than new technology, and they have survived because they work on the material as it actually behaves.
Shop Reference: Settings by Hole Diameter
The table below is the version worth taping to the drill press column. It assumes 16–18 mm melamine-faced panels with particleboard, MDF, or plywood cores, and a bit that is genuinely sharp. A dull bit invalidates every number in it.
| Hole diameter | Tool | Spindle speed | Backer | Masking tape |
|---|---|---|---|---|
| 3–6 mm | Brad-point bit, hand drill in a guide block | 1,200–1,800 rpm | Required | Recommended |
| 6–15 mm | Down-cut spiral bit in a trimmer with template | Router full speed | Not needed | Not needed |
| 10–20 mm | Forstner bit, drill press | 700–1,000 rpm | Required | Recommended |
| 26–35 mm | Hinge-boring bit or Forstner, drill press | 500–900 rpm | Required | Recommended |
Two numbers are worth committing to memory. First, the exit-side backer is worth more than any change in speed; if you can only fix one thing, fix the support. Second, chip clearing every 4–5 mm of depth prevents more blowout than a sharper bit does, because it removes the pressure that pushes the bore wall outward. Get those two right and almost any of the bits in the table will produce a hole you would be willing to leave visible.
Melamine board is not difficult to drill. It is simply unforgiving of generic technique. A twist bit, no backer, and a free hand will tear the skin almost every time, and the same panel drilled with the right geometry, a scrap of MDF underneath, and a moderate feed will come out clean on the first attempt. Match the cutter to the hole, support the exit, clear the chips, and the material behaves like the engineered product it is.





